Project 2, Weeks 3 and 4
This being the case, the third week of the project was
another one of painting and responding to my primary research from Lisbon. I
didn’t mind this, as I have gone out of my comfort zone by committing to
painting, and I think my painting and drawing skills have benefitted from this.
As a result, my work has taken on a much more illustrative and colourful feel. Nevertheless,
it means that this project will now run simultaneously to the next two which I have
planned: Bruntwood and i-Dott.
Along with my painting and drawing I have continued to
sample. In my samples so far, I have taken the most striking shapes and linear
qualities from my imagery to replicate in different materials. I have tried to
stay away from the more floral shapes found in the tiling from Lisbon and
instead have attempted to echo the geometric lines in the arrangements of the
tiles. As well as this I have drawn on the variation in colours found not only
in the tiles but also those which resulted from my printed-out photos, adding
some more variations in tone.
To push the material sampling and combing of materials, I have
begun to laser cut some of the shapes and then dye and paint them. I have
started with simple circular and semi-circular shapes in Perspex and wood. I then
dyed the Perspex, which gave a subtle tint of colour to the laser cut pieces. I
think this will work nicely when combining the pieces with fabric, as it will
allow the colours to blend rather than clashing with each other. The dyeing process
was very experimental, and I need to work out how to mix the disperse dyes to
get the right shade but now I know the process can work I just need to refine
the colours. One thing to note is that only the clear Perspex works with
dyeing, the opaque white picks up the tiniest hint of colour but not enough to ‘colour’
the shape and with varying results for each colour, so unpredictable. I have
also been dyeing fabric, and I got some very vibrant shades, however, as I am
considering my final pieces for interior contexts, I may stick to neutral coloured
fabric and screen print on top and embellish to add colour.
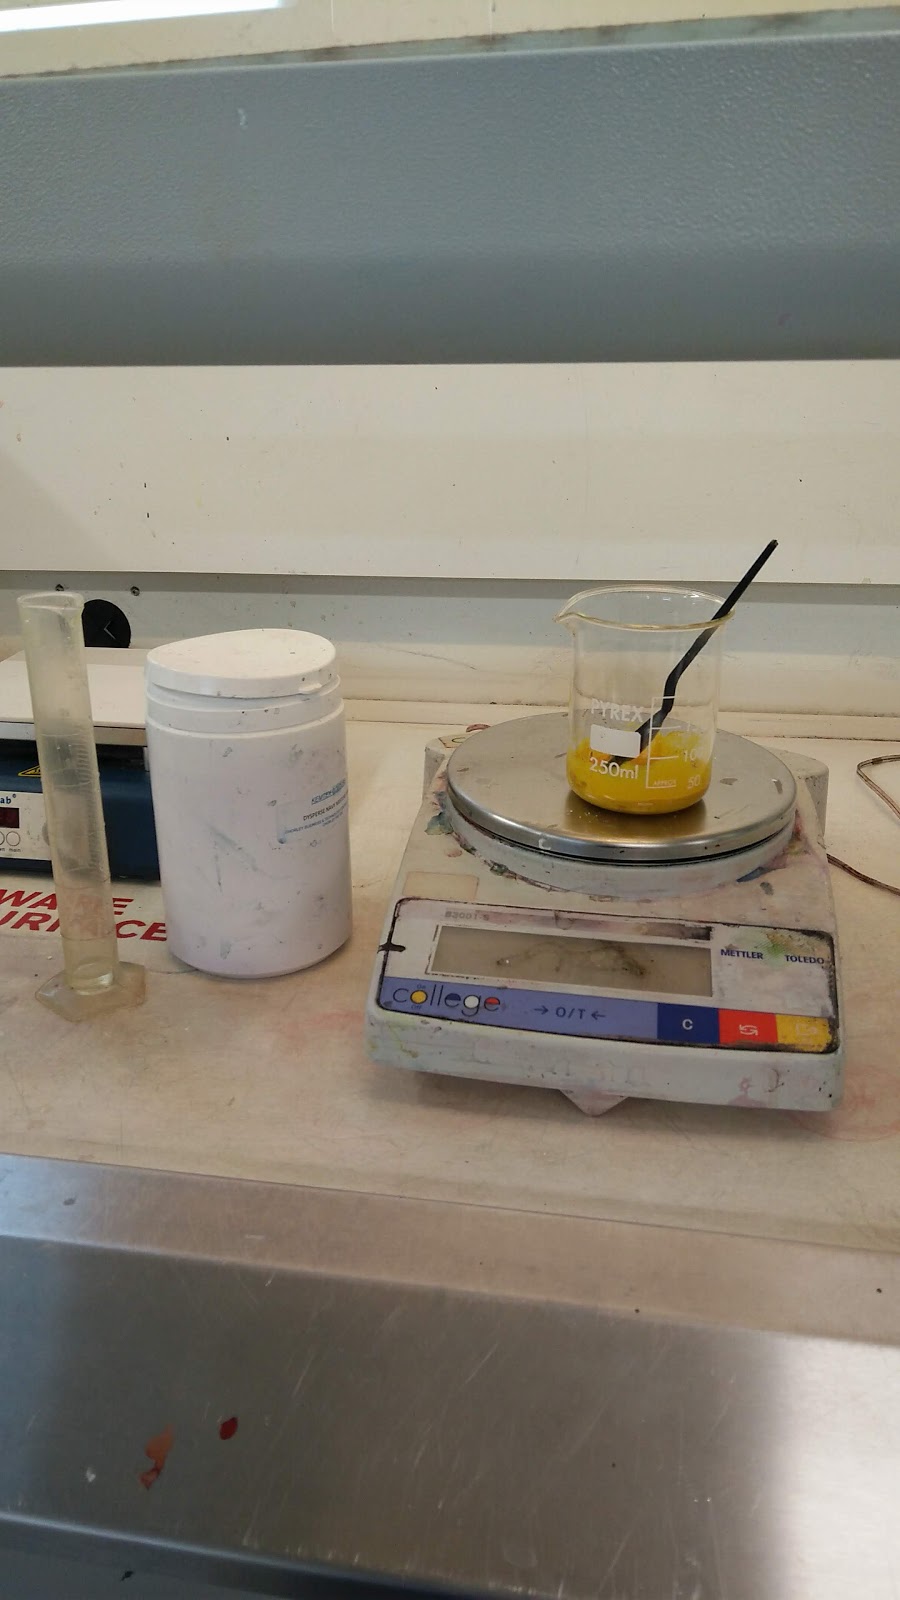


 |
| Fabric dyeing experimentation. |
Next for this project I will develop the shapes and forms from my sketchbook and sampling through collage into digital designs, which I will then screen print and digitally print onto fabric. Then I will embellish these with embroider, flocking, Perspex and wood laser cut pieces to create bespoke interior wall hangings. If I have time I would also like to try this on paper and see how they could work as bespoke wallpaper.

 |
| Laser cutting into wood and perspex. |
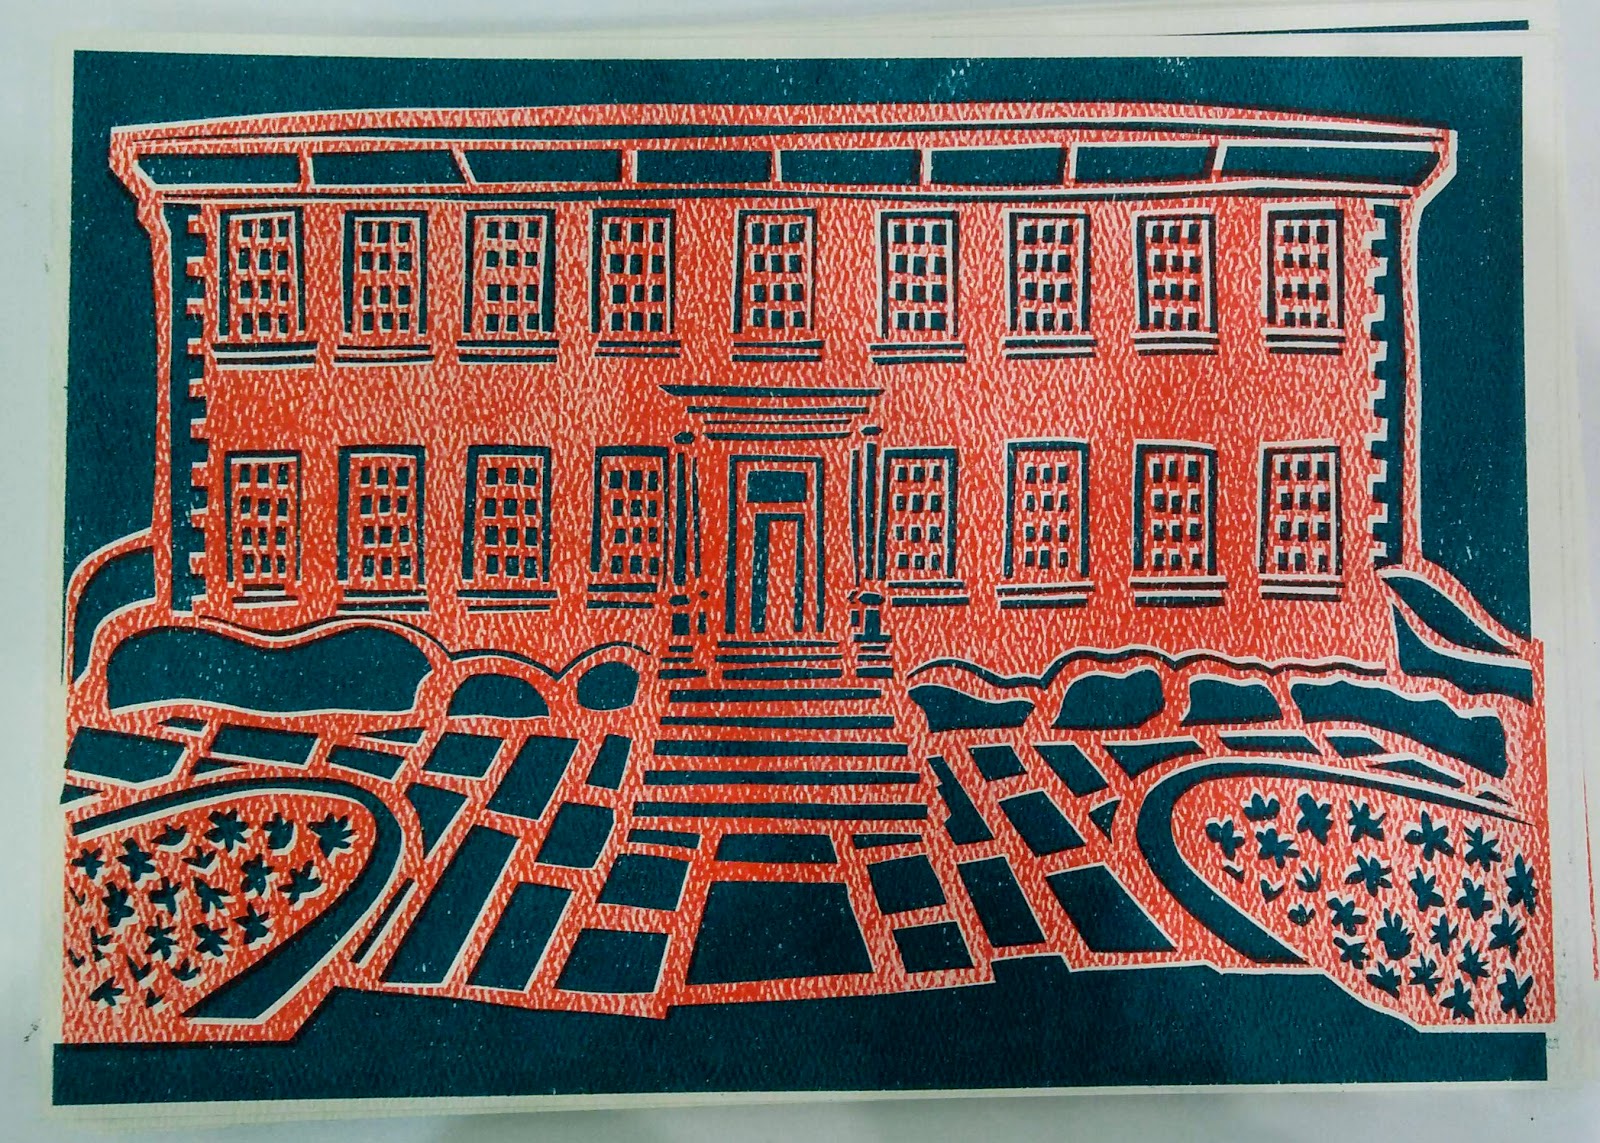
As well as this, during these two weeks I completed a one-day
project. I was approached to create a piece of work for a charity auction. The auction
to be held at Wordsworth House in Cockermouth, Cumbria is to raise money for
outdoor learning equipment for my old School and involves many artists local to
Cockermouth. For my piece I created a paper cut of Wordsworth House which I then
had printed on the risograph printer. I chose a plain cartridge paper and
textured paper to print onto as I wanted a more graphic version and one which
had texture which imitated the bricks of the building. I opted to do the print
in teal and burgundy red, as I wanted to give the print a slightly festive
feel. This was an absolutely great project which showed me how much I can
achieve in a day – that I can take an idea from nothing to completion in a very
short space of time. I would love to work in this way again as I feel that it
allowed me to think outside the box and focus on getting one thing right,
rather than trying to do lots of things at once.


 |
| Paper cut on plain cartidge. |
 |
| Paper cut on textured paper. |

Comments
Post a Comment